Summer Cheddar and Veg Sandwich

your favorite soft sandwich bread

1/4 green bell pepper

1/4 red bell pepper

2 leaves butter lettuce

3-4 cherry tomatoes, cut in half and lightly seasoned with salt

9-12 thin slices of cucumber

1 tbsp chopped roasted pistachios

2-3 oz sharp yellow cheddar

2 tbsp mayo

salt and fresh pepper

  1. Spread a generous layer of mayo on both slices, about 1 tbsp per slice.
  2. Add a good pinch of pepper to the sauced bread and place the halved tomatoes on top, cut side down
  3. Add the slices of cheddar on top of the tomatoes and pistachios, and the sliced bell peppers on the other slice of bread (the mayo helps the loose ingredients stay in the sandwich).
  4. Lastly, layer your cucumber on top of the cheese, then your lettuce. Combine both halves of your sandwich and slice into equal halves. Enjoy with your favorite summer beverage and a bag of chips!

Toasted Couscous Rice Pilaf

1/2 cup pearl couscous

1 scallion, finely chopped

3 tbsp olive oil

1/4 of a yellow onion, finely chopped

2 cloves of garlic, finely chopped

1/2″ knob of ginger, peeled and finely chopped

3 cups long grain rice, rinsed 3 times

2.5 cups water

1.5 cup full-fat unsweetened coconut milk

2 tsp hondashi stock powder (can be omitted if vegetarian)

2 tbsp butter

1.5 tsp salt

1 tsp white pepper

Equipment: Sauté pan with lid, slotted spoon, heatproof bowl, chef knife

  1. Put the olive oil in the pot and turn your burner to medium. Once the oil is loose and shimmering, add the couscous and toast until golden brown.
  2. Remove the couscous to your heatproof bowl, leaving as much oil in the pot as possible. Turn the heat to medium-low and add your scallion, onion, garlic and ginger. Cook until softened, but not browned.
  3. Add the rest of your ingredients, stir well and bring to a boil over medium-high heat.
  4. Once fully boiling, stir one more time and scrape any sticking rice off of the bottom to prevent clumping and burning. Turn the heat to as low as possible and cover with the lid. Simmer for 15 minutes.
  5. Remove the pot from the heat and let it sit covered for 15 more minutes. After the time has elapsed, fluff the rice with your slotted spoon until all the grains are separated as much as possible and serve!

Seasoning Mastery, pt 2

Welcome to the next part of my series Seasoning Mastery!

Part 1 explored my recommended best practice in terms of getting used to properly seasoning your food. You learned how to season a chicken leg to lip smacking perfection.

This time, we focus on seasoning water-based foods(broths, soups and stocks). There’s not so much direct instruction in terms of actually seasoning, the key here is to ready internalize seasoning, bit by bit.

Cooking with this medium is somewhat simple, but specific rules tend to be found across the world to allow for a duplicatable end result with potentially inconsistent ingredients. At the beginning, you want to keep seasoning with straight salt to a minimum. A pinch here or there, but most definitely avoid adding too much salt to start. It is important to note that you don’t have to avoid salt altogether, but too much salt early on can lead to a salty end product, especially after reducing the liquid by a measurable amount.

Also take into consideration salty ingredients like salted fish (fish sauce, anchovy paste), concentrates (bullion), preserved fruit (lemons, limes) or any other thing that is very strongly flavored and meant to lay a base of flavor for the rest of the dish. This seasons in the beginning, perfume,ing all other ingredients and allowing room for more salt to perfectly balance the flavors at the end of cooking.

A good method to getting your broths and soups to a perfect salt level is to go a little at a time. Taste constantly, adjusting levels of acid, salt, sweetness, fat to hone in on the best end result. My preferred method in terms of going a little at a time is to have a spoon, scoop up some broth and salt it lightly. Taste what’s on the spoon and think about the taste. If it tastes good, add some salt or other balancing flavor to the lot without adding too much. When in doubt, remember that you can’t take away once you add, and you can always add more if need be.

Once the liquid is delicious and balanced, you can enjoy on the spot, or you can pack it up into the fridge to cool and it will be even better the next day. This extra step can be the difference between good and great food.

But keep in mind, it’s your food and you can do with it what you want at the end of the day, I’m just here to help.

How I fed 15ish people

The Occasion: I was hired by a repeat customer to cook for a dinner to feed 15 people. I don’t know if it ended up being that many or more, but the food was a hit and there was plenty of it!

The Menu included bread, 4 dishes for the meal plus dessert and I was told to keep things somewhat light, highlighting the spring season.

Salad: Arugula, Purple leaf lettuce, watercress, mesclun, pickled red onion with a scallion oil and white balsamic vinaigrette and shaved aged cheese.

For the salad option, I like to blend greens for flavor, color and texture. Pickled red onion was actually my dad’s idea, and it ended up being the perfect pop of color dotted throughout the salad. Instead of the slivered pickled onion you normally see, I diced mine and added a small handful of rhubarb to add some depth and help keep the color a deeply rosy pink color. As for the aged cheese, I used grana padana and galmasano, the spanish equivalent to Parmesan, just to keep things a little more interesting yet cost effective.

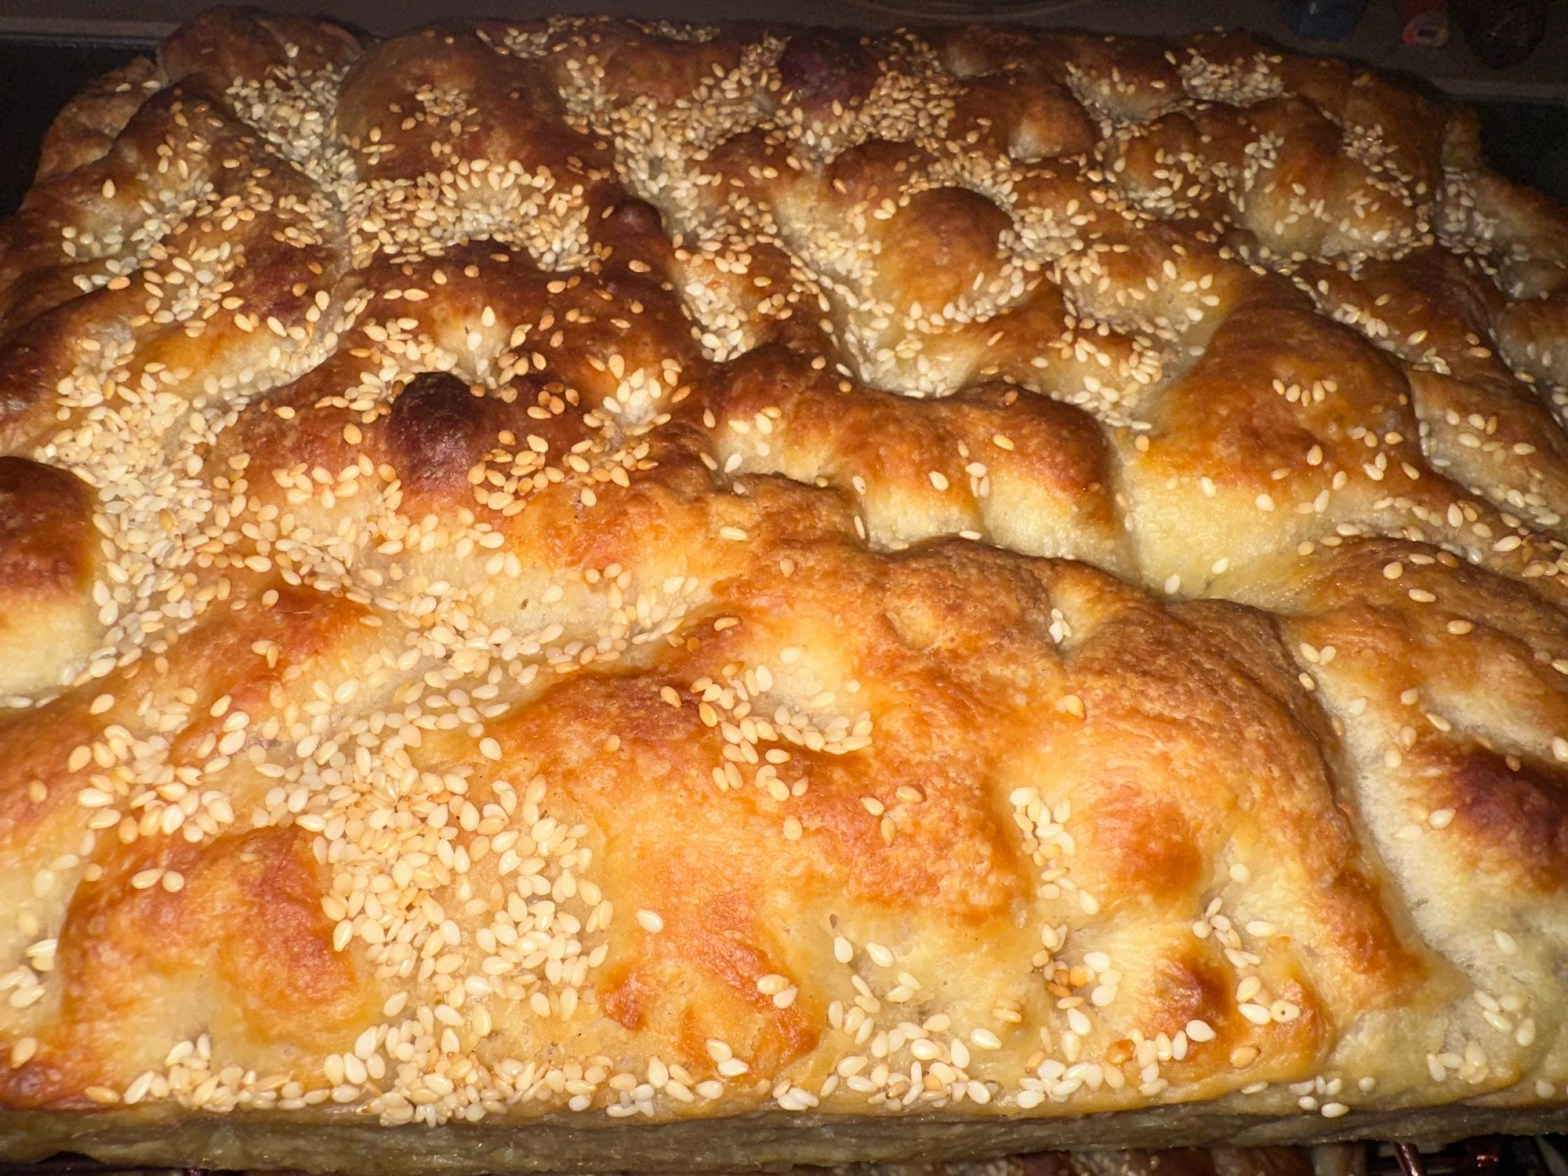
Bread: My tried and true no-knead focaccia, with a generous layer of chopped spring onions and fresh white pepper cracked over the top just before serving.

I worked on this recipe for years before finally getting it down to an easily repeatable process, and it hasn’t failed me yet! I’ve been using a Spanish blend of Picual and Hojiblanca olive oil from a brand called Zoe and it’s been giving me delicious results.

Main: Spatchcocked Roast Chicken with lemon curd piped under the skin after curing in the fridge for 2 days.

I used scissors to cut out the backbones of 4 large air chilled chickens from a supermarket near me. The choice of air chilled means there is less water surrounding the chicken and thus will season itself a little quicker in the curing process. I used a piping bag once the skin was seasoned and nicely firm to get the salted lemon curd under the skin all the way to the hard-to-reach parts. After roasting, there was nice caramelization across the skin due to the sugar and eggs in the curd. The meat came out perfectly cooked and the skin was nicely caramelized.

Starchy Side: turnips and sweet potatoes roasted in chunks under the chicken with nutritional yeast, salt and white pepper.

I cut the root veg into roughly 1″ chunks and tossed with a little salt and nutritional yeast before placing the chickens on top and roasting.

Veggie Side: Carrots and Edamame on top of Golden Herb yogurt

To help with ease of prep, I took 1 and a half bags of baby carrots and quartered them, along with 2 bags of shelled frozen edamame. I cooked them in butter, nutritional yeast, white balsamic vinegar, a pinch of sugar, a pinch of salt and a pint of richly reduced chicken stock that I made from the backs of the chickens. For the base of golden yogurt I mixed turmeric, umeboshi vinegar, chopped tarragon and dill, salt and nutritional yeast for a deeply flavorful and bright yogurt sauce. Guests were scraping the plate to make sure every bit of it got eaten!

Sauce: Caper Beurre Blanc

I reduced white balsamic, caper juice, chopped shallots and a couple stems of tarragon until the vinegar was nicely thickened and slightly syrupy. For service, I added a half cup or so of heavy cream, a few tablespoons of capers and I mounted in a half stick of butter, adjusting seasoning for taste with salt and white pepper.

Dessert: Cherry Rhubarb Compote with Cornmeal Crumble and Burnt White Chocolate Chantilly

The compote was simple, just chopped rhubarb, a frozen mix of sweet and sour cherries, sugar, agave, salt and white balsamic. I cooked it down until everything was well broken down and tender.

The cornmeal crumble really came out more like a giant soft cornmeal shortbread, which I’m not mad about. Melted butter with Jiffy corn muffin mix, spread across a glass baking dish and baked until golden brown.

For the final component, the cream, I caramelized some white chocolate in a saucepan and then cooled and beat it into some softly whipped cream with crème fraiche until everything was stiff and rich. This whipped cream balanced the whole dessert perfectly with its richness, tanginess and toasted marshmallow-esque bitterness.

All in all, the meal turned out very well. There was plenty of leftover chicken, turnips, sweet potatoes, beurre blanc and focaccia, which is how I like it. Plenty of food for everyone to have enough of. I’m glad I was given the opportunity to cook for a return client.

No Knead Sesame Seed Focaccia

600 g and 80 g lukewarm water seperated

5 g active dry yeast

20 g agave

54 g, 40 g and 20 g extra virgin olive oil separated

750 g bread flour

18 g and 5 g kosher salt separated

45 g sesame seeds

Equipment: whisk, wooden spoon, 1 large mixing bowls (enough extra space to allow for rising), 1 medium mixing bowl, 2.5″ deep half hotel pan, parchment paper, probe thermometer, cooling rack

  1. Mix 600 g of water, yeast, agave, and 54 g of olive oil with your whisk in a large mixing bowl. Then in a separate bowl mix the bread flour and 18 g of salt.
  2. Once both bowls are thoroughly mixed, add the dry to the wet and mix until no dry flour remains. Cover and let it proof on the counter for 12-15 hours. If it’s below 70 F in your kitchen, proof it closer to 15 hours.
  3. Once the time has elapsed your dough should have expanded by at least 100%. Add the parchment paper to your pan so that there are 2 sides with a couple inches of paper sticking above the pan.
  4. 40 g of olive oil goes on top of the parchment paper, spread it all across the bottom and up the sides of the pan. Add your proofed dough.
  5. Spread the dough as close to the corners of the pan as it can go without too much effort. Coat the top of the dough with the remaining 20 g of olive oil and let it rest for 15- 20 minutes, or until the dough has relaxed enough so that it can be spread to the edges easily.
  6. Once the dough is spread to each corner, press your fingers into the dough enough times that there isn’t more than 1 square inch or so of dough left untouched.
  7. Evenly pour over the sesame seeds, making sure to get them on the edges as well as the middle. With the remaining 80 g of your water and the 5 grams of salt set aside earlier, make a brine and pour it over the top of the crimped dough.
  8. Let it rest an additional 45 minutes if your kitchen is warm or an hour if your kitchen runs a bit cooler. Preheat your oven to 450 F and move your rack to its lowest position at this point as well.
  9. Once the dough has expanded by 2x and is nice and jiggly, put it in the oven and bake for 25 minutes. Once that time has elapsed, rotate the pan and replace in the oven or another 15 minutes.
  10. At this point, move your oven rack to the highest position possible while still allowing room for the bread. Bake until your probe thermometer reads 210-211 F at the center of the dough.
  11. Remove from the oven and use the extra parchment paper on both sides of the bread to remove it from the pan. If any of the bread exposed to the bare hotel pan sticks, carefully use a spatula to release it from the pan. Once you have the bread out of the pan, place it on a wire rack to cool and dispose the paper after it has cooled enough to handle fully.
  12. Wait until the bread cools completely to slice and serve with your preferred accoutrements or as the base of a sandwich!

The Best Turkey Meatloaf Ever

1.5 lbs ground Turkey

2 slices white bread, crusts removed

1/4 cup heavy cream

1/4 cup milk

1 onion

1/2 of a green bell pepper

1/2 of a red bell pepper

1 tsp neutral cooking oil

1 whole egg

1/2 tbsp garlic powder

1/2 tbsp smoked paprika

1/2 tbsp dried thyme

1/2 tbsp ground ginger

3/4 tbsp salt, plus 1 pinch for sauteing

1/2 tbsp pepper

1/4 cup of ketchup, plus more for serving

1/4 cup grated parmigiano reggiano or grana padana cheese

hot sauce

Equipment: 1 small mixing bowl, 1 medium mixing bowls, cheese grater, chef knife, rimmed sheet pan, saute pan, silicon or wooden spoon

1. Tear the crustless bread into small pieces and soak in a mixture of the cream and milk until its completely mushy (15-20 minutes) in the small mixing bowl.

2. Peel and grate the onion into the medium bowl and preheat your saute pan with the oil over medium heat.

3. Chop the bell peppers into small pieces and add to the hot pan with a pinch of salt and cook until they are softened but not browned. Add to the bowl of grated onion.

4. Drain the excess liquid from the soaked bread and add the bread and the ground turkey to the bowl of grated onion and cooked peppers.

5. Beat the egg with a fork and add to the bowl along with the spices, cheese and ketchup. Mix until fully combined.

6. Form into a loaf shape on a sheet pan and bake at 400F until a meat thermometer inserted into the middle reads 155 F.

7. Let the meatloaf rest for 15 minutes, slice and serve with ketchup, hot sauce and preferred sides.

Brown Butter Egg Whites

Have you ever made a recipe that calls for egg yolks, leaving you with multiple eggs’ worth of whites to waste?

Don’t fret, I’ve come up with a perfect use for those lone whites that is delicious enough to make keeping up with them worthwhile.

Ingredients

1 Tbsp butter

4 egg whites/ 1/2 cup liquid egg whites

1 slice white american cheese (broken up into small pieces)

salt and pepper to taste

Something carby to accompany your eggs (crusty bread, toast, rice, etc)

Equipment

small nonstick pan (you can use a well seasoned carbon steel/ cast iron of you’d prefer), rubber spatula

  1. Heat your tbsp of butter over medium-high heat until the bubbling subsides and the milk solids have darkened. Season your egg whites with a pinch of salt, 2-3 cranks of freshly ground black pepper and your broken up slice of cheese.
  2. Immediately turn the heat down to medium-low, and add your egg whites.
  3. Stir it quickly with your rubber spatula, incorporating the butter into the eggs and breaking up any large curds that form.
  4. Once the whites are no longer watery and are almost completely firmed up, remove them to a plate and enjoy with your preferred carb!

Creamy Spinach Flatbread

makes 4 servings

2 tbsp Olive oil

6 cloves garlic minced or grated on a microplane

3 scallions, sliced

1/2 a small yellow onion, small diced

1 bundle spinach (not baby) washed and chopped with stems removed,

3 tbsp lemon juice

2 tbsp rice vin

1.5 cups cream, reduced by half

7 oz freshly grated gruyere

Salt to taste

4 pieces 6-8″ store-bought pita bread or flatbread

8 oz low moisture mozzarella, cut into small cubes

Equipment: large sauté pan, chef knife, cutting board, microplane, salad spinner, cheese grater, tbsp measuring spoon, 1/2 cup measure, 1-2 sheet pans, cooling rack

  1. Preheat your sauté pan with the oil in it. Once the oil is hot, add the scallions, onion, and garlic and cook until soft, avoiding brow. Avoid
  2. By the end you should have just under a quart’s worth of the creamy spinach topping. You can use it as a filling, spread, or dip, but today we’re using it to make flatbreads.
  3. Preheat your oven to 400℉ and spread a quarter of the filling on each flatbread from edge to edge. Place 2 oz of the cheese on each flatbread. The cheese shouldn’t cover it completely.
  4. Place your flatbreads onto your sheet pan and then put that on the lowest rack of your oven for 10-15 minutes, or until the bottoms have crisped and the edges have browned slightly. If your cheese hasn’t melted all the way, move the pan to the top rack in the oven and bake until molten and bubbly.
  5. Cool on a rack for 5-10 minutes, cut into quarters and enjoy!

Lemon Curd Roast Chicken

feeds 3-4 people

1 whole spatchcocked chicken

4 hefty 5-finger pinches of salt

200 g lemon curd

1 tbsp neutral oil

1 tbsp corn starch

1 cup water (or more as needed)

2 tsp chicken better than bullion

1 tbsp cold butter

Equipment: sheet pan set with a rack (for marinating), large sauté pan, oven, sheet pan (for resting after cooking), small saucepan, small tupperware/ deli container, small mixing bowl

  1. Season the whole chicken with the salt starting with the underside and working your way to the skin-side. Carefully pull the skin away from the meat where the backbone and head/neck were cut from the carcass. Try not to pull the skin all the way off and do your best to not tear the skin either. Make sure to get salt as far under the skin as possible so that the whole thing will be thoroughly seasoned.
  2. Flip the chicken back over and spread half of the lemon curd onto the exposed underside surface. Once there are no more uncovered spots, flip it back over one last time and spread the rest of the curd wherever you put salt under the skin.
  3. Set the chicken skin side up in your racked sheet pan and let it marinate on the bottom shelf of your fridge uncovered for between 24-48 hours so that the skin dries out well.
  4. Preheat your oven to 375℉ and take the chicken out of the fridge, let it sit on the countertop while the oven comes up to temp. There should be some lemon curd accumulated in the sheet pan under your chicken, and that’s fine. Reserve this extra curd and refrigerate until ready to use. Preheat your pan over medium heat with the oil until it’s shimmering. Dry off any moisture that has formed on the skin and place your chicken skin side down in the pan. Immediately turn the heat down to medium-low.
  5. Cook your chicken until the skin is browned and then flip it over and place the pan into the middle rack of your oven. Roast until a meat thermometer reads 155℉ in the deepest part of the breast, careful not to touch the bone. Move the chicken to your clean sheet tray to rest. Its temperature will continue to rise for the next 15-20 minutes until the chicken is perfectly cooked.
  6. Pour your pan drippings into your saucepan along with the extra curd that was under your chicken when it was in the fridge, heat that mixture on the stove over medium heat. In your small mixing bowl, add the cornstarch and mix in the half cup of water with a fork. Once fully combined, add the bullion paste and mix again. Add the mixture to your pan of lemon curd and mix again. This is the sauce for your chicken.
  7. Bring your sauce to a boil until thickened and remove it from the heat. Add your cold butter and keep your sauce moving with a spoon until it has melted and incorporated itself completely into your sauce. Carve your chicken and serve the sauce alongside with your favorite sides and enjoy!

Zucchini Ribbon Salad

1 zucchini, shaved longways

1 squash, shaved

Salt

2 tbsp lemon juice

2 tbsp high quality vinegar (rice or sherry)

1/2 tbsp agave

10 grape tomatoes, halved

2 larger or 3 smaller scallions, cut thinly on a bias

1 cob’s worth of corn

8-10 mint leaves, chiffonade large ones and leave small ones whole

1 pack of tarragon (6-8 stems worth), picked and left whole

4 oz crumbled fresh feta

Salt to taste

A lot of freshly cracked Black pepper (at least 10 cranks, but to taste)

Equipment: large mixing bowl, 1 small mixing bowl, utility/ paring knife, cutting board, mandolin

  1. Cut the ends off of the zucchini and carefully slice it from end to end with the mandolin. You should have long, thin ribbons of zucchini.
  2. Cut the ends off of the squash as well, but cut it with the madoline into thin rounds. Combine with the zucchini ribbons and add a hefty pinch of salt. Carefully mix until everything is coated in salt and let it sit for 15 minutes.
  3. While that’s sitting, mix the lemon juice, vinegar, olive oil, salt, and agave until fully incorporated. Slightly undersalt the dressing to account for the salty feta on top at the end.
  4. Drain the liquid from the sliced zucchini and squash and add the mixed dressing along with your prepped tomatoes, scallions and corn.
  5. Plate the the dressed salad and garnish with the fresh herbs, crumbled feta and black pepper.
  6. Enjoy!